As a curly hair girl, I swear my hair has a personality of its own — the second I straighten it, I want my curls back, and the moment I wash it, I’m craving sleek, pin-straight strands again. It’s a curly-girl phenomenon that’s hard to explain, but if you know, you know. I love my curls, but wearing my hair straight for a few days each month gives me a fresh look and makes my morning routine feel effortless.
The key is using the right tools. With a quality heat protectant and a bonnet at night, I can keep my hair smooth without sacrificing its health. The straightener that’s made the biggest difference for me is the 7MAGIC Nano Titanium Hair Straightener. It heats evenly, glides without snagging, and leaves my thick curls silky and shiny — not flat or fried. If you want salon-level straight hair at home, this tool is absolutely worth trying.
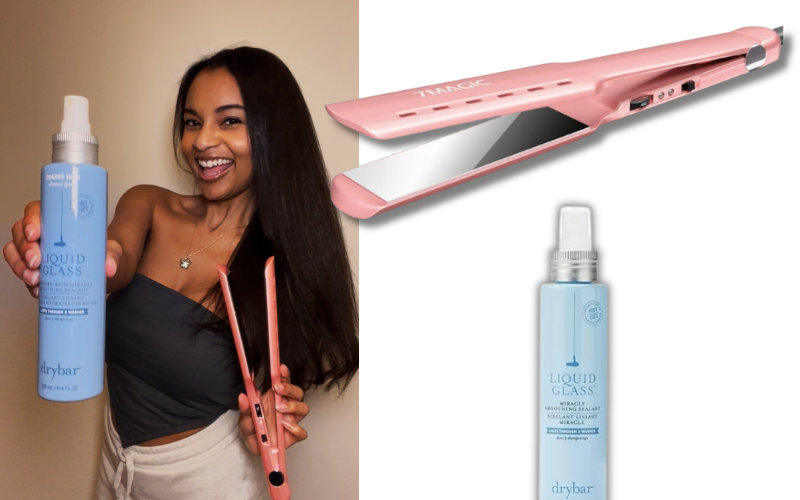
7MAGIC Nano Titanium Hair Straightener – Amazon, $36.99

Why I Love the Straightener I Use
Honestly, the game-changer in my curly-to-straight routine is my 7MAGIC Nano Titanium Hair Straightener. The extra-wide nano titanium plates heat evenly and glide through thick, curly hair without snagging — meaning fewer passes and less heat stress on each strand.
Because the plates cover more surface area than a typical narrow iron, I can straighten larger sections at once and get that sleek, smooth finish faster.
And can we talk about price? This straightener is so affordable compared with high-end salon tools, so you get great results without dropping hundreds of dollars. For a budget-friendly option that still delivers shiny, long-lasting straight hair, this has become my go-to tool.
Step 1: How I Prep and Straighten My Curly Hair Without Damage

My straightening routine starts in the shower. I wash with Aussie Miracle Curls Shampoo to gently cleanse while keeping my curls hydrated — this helps prevent that dry, puffy look once heat hits my hair. After towel drying, I prep with a light mist of Drybar Liquid Glass Miracle Smoothing Sealant. The key is restraint: I don’t overspray and I keep the bottle a few inches away so the product distributes evenly instead of soaking one spot.
I let my hair air dry as much as possible to minimize heat exposure. Once it’s mostly dry, I blow-dry the mid-lengths to smooth everything out before going in with a straightener. This prep step makes a huge difference — my hair feels softer, looks shinier, and straightens faster with less stress.
Step 2: How I Straighten My Hair Without Frying It
When it’s time to straighten, I’m really mindful of heat. I keep my tool set around 350°F, which is hot enough to smooth my curls without completely frying my hair. Working in small sections helps me get sleek results in fewer passes — which is key for keeping hair healthy.
For my roots, I’ll briefly turn the heat up just a bit. Roots tend to be the most stubborn area, so that little boost helps everything blend smoothly without me having to go over the same section again and again. I use the 7MAGIC Nano Titanium Hair Straightener because it heats evenly and glides through my curls without snagging, making the process faster and less stressful on my hair.
Step 3: Seal the Ends With a Lightweight Hair Oil
Once my hair is straight, I always finish with a tiny bit of hair oil on the ends. This step makes a bigger difference than people think. Straightening can leave your ends looking a little thirsty, so running a drop or two of oil through them brings back shine and softness instantly.
The key is using less than you think you need. I warm a small amount between my palms and lightly smooth it over just the ends — not the roots — to avoid weighing my hair down. This helps tame flyaways, adds polish, and keeps my style looking fresh instead of dry or stiff.
Read More: Why I Have 3 Jars of Skala Hair Cream
Think of this as the finishing touch: sleek, glossy ends that make your straight hair look intentional, healthy, and salon-done without any extra effort.
Step 4: Sleep in a Bonnet to Keep Hair Smooth Overnight
The biggest secret to making my straight style last is sleeping in a bonnet. It might sound simple, but it seriously changes everything. A bonnet helps keep my hair cool and protected while I sleep, which cuts down on friction, frizz, and that puffy texture that can show up overnight.
Once my roots are pin-straight and I’ve finished styling, I pop my hair into a soft bonnet before bed. Instead of waking up with bent ends or frizz, my hair stays smooth and polished. That means less heat styling the next morning — sometimes none at all — which is a huge win for hair health.
If you want your straight hair to last for days, this step is non-negotiable. The bonnet does most of the maintenance work while you sleep, helping your style stay sleek, shiny, and ready to go.
Read More: How to Refresh Hair and Scalp Without Shampoo
This article contains affiliate links. That means if you click and purchase through certain links, I may earn a small commission at no extra cost to you. I only share products I genuinely use and love, and any opinions are completely my own. Thank you for supporting my content!